
Article Plan: 8×10 Lifetime Shed Instructions
This comprehensive guide details building an 8×10 shed, leveraging plans from sources like MyOutdoorPlans.com and Heartland’s Rainier model.
We’ll explore costs, materials, and DIY versus pre-built options, ensuring a successful project with expert guidance and safety precautions.

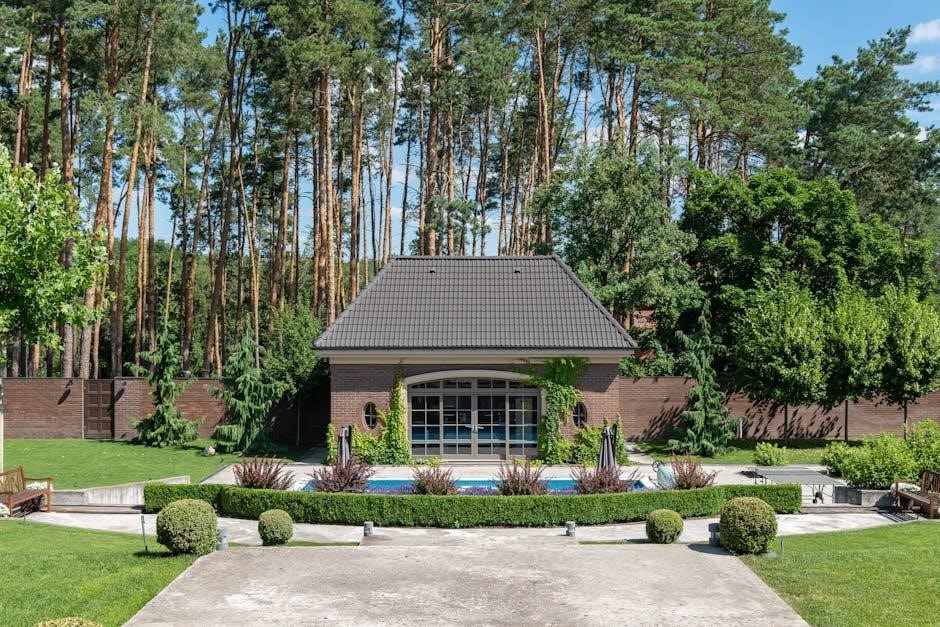
Embarking on an 8×10 shed project offers a fantastic solution for storage needs, gardening supplies, or even a dedicated workshop space. This size strikes a balance between functionality and manageable construction, making it ideal for DIY enthusiasts. The popularity of this shed dimension is reflected in the abundance of available plans, ranging from free resources like MyOutdoorPlans.com, offering diverse sizes including 8×10, to commercially available blueprints like the Summerwood Sonoma 8×10.
Many builders successfully adapt existing plans, such as the Heartland Rainier 10×10, to suit their 8×10 requirements. Understanding the core principles of shed construction, from foundation preparation to roofing installation, is crucial. This guide will navigate you through each step, considering material sourcing, cost estimation, and essential safety precautions. Whether you’re a seasoned woodworker or a beginner, building your own shed provides a rewarding experience and a customized storage solution tailored to your specific needs.
Benefits of Building Your Own 8×10 Shed
Constructing your own 8×10 shed unlocks significant advantages over purchasing a pre-built or professionally installed structure. Primarily, cost savings are substantial; sourcing materials independently, as demonstrated by those utilizing Lowes kit instructions for material lists, often proves cheaper than a complete package. Furthermore, DIY construction allows for complete customization – adapting the design to perfectly match your needs and aesthetic preferences.
You gain valuable skills and a sense of accomplishment throughout the building process. Comparing DIY costs versus pre-built sheds reveals a considerable financial benefit, especially if you already possess the necessary tools. Access to resources like free plans from MyOutdoorPlans.com further reduces expenses. Ultimately, building your own shed provides a durable, personalized, and cost-effective storage solution, offering long-term value and satisfaction.
Understanding the Heartland Shed Plans (Rainier 10×10 as a Base)
The Heartland Shed Rainier 10×10 plan, available as a PDF from Heartland Industries, serves as an excellent foundation for an 8×10 shed project. While designed for a 10×10 structure, the core framing and construction techniques are readily adaptable. Users have successfully utilized these instructions to source materials independently, effectively building from a plan rather than relying on a kit.
Key elements to understand include the floor framing, wall assembly, and roof pitch details outlined in the Rainier instructions. Scaling down from 10×10 to 8×10 requires recalculating material quantities and adjusting dimensions accordingly. Careful review of the plan’s material list and cutting diagrams is crucial. This approach offers a detailed blueprint, allowing for a robust and well-constructed shed, even with modifications for a smaller footprint.
Tools Required for Construction
Successfully building an 8×10 shed demands a range of tools, from basic hand tools to power equipment. Essential items include a circular saw for cutting lumber, a drill/driver for fastening, and a level to ensure a square and plumb structure. A measuring tape, speed square, and chalk line are vital for accurate layout.
For foundation work, a shovel and potentially a tamper are needed. Framing requires a hammer, while roofing benefits from a nail gun. Safety gear is paramount: safety glasses, work gloves, and hearing protection are non-negotiable. Consider a reciprocating saw for adjustments and a ladder for roof access. Having the right tools streamlines the process and contributes to a professional finish.
Materials List: Sourcing and Cost Estimation
Accurately estimating material costs is crucial for budgeting your 8×10 shed project. Lumber forms the core – framing, sheathing, and trim – sourced from local lumberyards or big box stores like Home Depot and Lowe’s. Roofing materials, including shingles and felt paper, contribute significantly to the expense. Fasteners – nails, screws, and bolts – are essential, and quality matters for longevity.
Expect to spend on foundation materials like gravel. Sourcing locally can reduce costs, but compare prices. A rough estimate, excluding foundation, ranges from $1,500 to $3,000+, depending on material choices. Detailed plans, like those from Heartland or Summerwood, provide specific quantities. Careful planning minimizes waste and keeps your project on track.
Lumber Selection (Framing, Sheathing, Trim)
Choosing the right lumber is vital for a sturdy 8×10 shed. For framing, pressure-treated lumber is essential for ground contact and resisting rot. Consider 2x4s for wall studs and rafters, and 2x6s for floor joists, ensuring proper spacing for structural integrity. Sheathing typically uses OSB (Oriented Strand Board) or plywood – ¾ inch thickness is recommended for the floor and ½ inch for walls.

Trim lumber, like pine or cedar, adds a finished look. Prioritize straight, knot-free lumber to simplify construction and enhance durability. Check for warping or twisting. Sourcing from a reputable lumberyard ensures quality. Consider the grade of lumber; higher grades are more expensive but offer fewer imperfections.
Roofing Materials (Shingles, Felt Paper)
Selecting appropriate roofing materials is crucial for protecting your 8×10 shed from the elements. Asphalt shingles are a popular, cost-effective choice, available in various colors and styles. Consider architectural shingles for enhanced durability and aesthetic appeal. Before shingle installation, apply felt paper (roofing underlayment) to create a waterproof barrier.
Ensure proper overlap of felt paper and shingles to prevent leaks. Alternatives to asphalt include metal roofing, offering longevity but at a higher cost. Calculate the required amount of materials based on roof area, accounting for overlap and waste. Proper ventilation is also key; consider ridge vents or soffit vents to prevent moisture buildup.
Fasteners (Nails, Screws, Bolts)
Choosing the right fasteners is vital for a structurally sound 8×10 shed. Galvanized nails are suitable for framing, resisting rust and corrosion. However, screws generally offer superior holding power, especially for sheathing and siding. Use exterior-grade screws designed for treated lumber.
Bolts are essential for securing the shed to the foundation and for reinforcing critical connections. Select bolt sizes and lengths appropriate for the lumber dimensions. Pre-drilling holes prevents wood splitting, particularly with hardwoods. Consider using construction adhesive in conjunction with fasteners for added strength and a weather-tight seal. Ensure all fasteners are compatible with treated lumber to avoid chemical reactions.
Foundation Preparation
A solid foundation is paramount for a durable 8×10 shed. Begin with site leveling, removing vegetation and debris. Accurate leveling ensures the shed is square and prevents future structural issues. Next, establish the shed’s perimeter and excavate to the appropriate depth, considering local frost lines.
Gravel base installation follows, providing drainage and a stable surface. Compact the gravel thoroughly in layers to prevent settling. Alternatively, concrete piers or a full concrete slab offer enhanced stability, particularly for heavier storage needs. Proper foundation preparation minimizes moisture intrusion and extends the shed’s lifespan. Ensure the foundation is larger than the shed’s footprint for optimal support.
Site Leveling and Groundwork
Preparing the site is the crucial first step. Begin by carefully selecting a location, considering drainage and accessibility. Clear the chosen area of all vegetation, rocks, and debris. Utilize a level and measuring tools to identify high and low spots. Excavate high areas and fill low areas with compacted soil, striving for a perfectly level surface.
Groundwork involves establishing a firm base. Stake out the shed’s perimeter accurately, ensuring square corners. Double-check measurements diagonally to confirm squareness. Consider a gravel base for improved drainage and stability, compacting it in layers. Proper site leveling and groundwork prevent future structural problems and ensure a long-lasting shed.
Gravel Base Installation
A gravel base provides essential drainage and a stable foundation. Begin by excavating the area within the staked perimeter to a depth of approximately 4-6 inches. Lay down landscape fabric to prevent weed growth and gravel migration. Pour crushed gravel into the excavated area, spreading it evenly with a rake.
Compaction is key for a solid base. Use a plate compactor to thoroughly compact the gravel in layers, typically 2-inch lifts. This process ensures a dense, level surface capable of supporting the shed’s weight. Check for levelness frequently during compaction. A well-installed gravel base minimizes moisture issues and extends the shed’s lifespan, offering a robust foundation for construction.
Framing the Shed: Floor Construction
Begin by constructing the floor frame using pressure-treated lumber. Cut the lumber to the required dimensions – typically 2x6s for the perimeter and 2x4s for the joists, spaced 16 inches on center. Assemble the frame using nails or screws, ensuring square corners.
Add blocking between the joists for added support. Once the frame is assembled, lay it onto the prepared gravel base. Ensure it remains level. Attach plywood sheathing (typically ¾ inch) to the frame, using screws for a secure hold. This creates a solid, level floor platform. Proper floor construction is crucial for the shed’s structural integrity and long-term stability.
Wall Framing: Building the Structure
Construct the wall frames using 2×4 lumber, again spaced 16 inches on center for studs. Include top and bottom plates, and headers above window and door openings. Assemble each wall frame on the floor, ensuring squareness before raising it into position.
Securely attach the wall frames to the floor frame using nails or screws. Brace the walls temporarily to maintain plumb until the roof is installed. Connect the wall frames to each other at the corners, creating a rigid box structure. Accurate framing is vital for a weather-tight and structurally sound shed. Double-check all measurements and connections for stability.
Roofing Installation: Step-by-Step Guide
Begin by installing roof sheathing, typically OSB or plywood, over the rafters. Ensure proper spacing and secure with nails or screws. Next, apply felt paper or a synthetic underlayment to create a waterproof barrier. Overlap the seams adequately to prevent water intrusion.
Install shingles, starting from the bottom edge and working upwards, overlapping each row according to the manufacturer’s instructions. Use roofing nails to secure the shingles. Pay close attention to detail around vents and chimneys. Proper roofing installation is crucial for protecting your shed from the elements and ensuring its longevity.
Siding Installation: Achieving a Weather-Tight Seal
Begin by applying a moisture barrier, like house wrap, to the exterior walls. Overlap seams by at least six inches and secure with staples. Next, install your chosen siding material – options include wood, vinyl, or engineered wood. Start at the bottom and work upwards, ensuring each course overlaps the previous one.
Use appropriate fasteners, such as nails or screws, designed for your siding material. Pay close attention to corners and around windows and doors, using trim to create a clean and weather-resistant finish. Proper siding installation is vital for protecting the shed’s structure and maintaining a professional appearance.

Door Installation: Ensuring Proper Functionality
Begin by assembling the door frame within the rough opening, ensuring it’s square and plumb using a level. Secure the frame to the wall framing with sturdy screws. Next, hang the door, using hinges appropriate for the door’s weight and material. Adjust the hinges to ensure smooth opening and closing, and proper alignment with the frame.
Install a latch and handle set, ensuring it engages securely. Weatherstripping around the door frame is crucial for a tight seal, preventing drafts and moisture intrusion. Finally, check for any gaps and address them with caulk or additional weatherstripping. A properly installed door enhances security and usability.
Window Installation (If Applicable)
If your 8×10 shed design includes windows, carefully prepare the openings in the wall framing. Ensure the openings are square and sized correctly for the chosen windows. Apply a generous bead of caulk around the window frame before inserting it into the opening. Secure the window frame to the wall studs using screws, ensuring it’s plumb and level.
Insulate around the window frame with expanding foam to prevent drafts and moisture. Install exterior trim to cover the gap between the window frame and the siding, creating a weather-tight seal. Finally, test the window operation and ensure it opens and closes smoothly. Proper window installation enhances light and ventilation.
Shed Floor Installation

After foundation preparation, begin installing the shed floor. Start by laying down pressure-treated lumber for the floor joists, ensuring they are spaced correctly according to your plans – often 16 inches on center. Secure the joists to the perimeter frame with nails or screws. Next, install the subfloor, typically using OSB or plywood sheets.

Stagger the seams of the subfloor sheets for added strength and stability. Fasten the subfloor securely to the joists with screws. Consider adding a vapor barrier between the ground and the subfloor to prevent moisture buildup. Finally, ensure the floor is level and structurally sound before proceeding with wall framing. A solid floor is crucial for a durable shed.
Comparing DIY Costs vs. Pre-Built/Installed Sheds
Building an 8×10 shed yourself can significantly reduce costs compared to purchasing a pre-built or professionally installed unit. DIY allows control over material quality and customization, potentially saving hundreds or even thousands of dollars. However, DIY requires time, skill, and tools. Material costs, sourcing lumber, roofing, and fasteners, need careful estimation.
Pre-built sheds offer convenience but come with a higher price tag, including delivery and installation fees. Kits fall in between, providing materials but still requiring assembly. Consider your skillset and time constraints. If you have tools and help, DIY is viable; otherwise, a pre-built option might be more practical. Evaluate long-term value and potential savings.

Utilizing Free Shed Plans from MyOutdoorPlans.com
MyOutdoorPlans.com offers a vast library of free shed plans, including options adaptable for an 8×10 structure. These plans provide detailed instructions, material lists, and cutting diagrams, making DIY construction accessible. While a direct 8×10 plan might not always be available, plans for similar sizes – like 8×8 or 10×10 – can be modified to suit your needs.
Carefully review the plans before starting, ensuring you understand each step. Consider the skill level required and adjust the design if necessary. Supplement these free plans with resources like Heartland’s Rainier 10×10 instructions for additional guidance. Remember to always prioritize safety and adhere to local building codes when utilizing any free shed plan.
Summerwood Sonoma 8×10 Shed Plan Review
The Summerwood Sonoma 8×10 shed plan, available for purchase, is a popular choice for DIYers. Users report the plan is relatively thorough, offering detailed drawings and instructions for constructing a sturdy and attractive shed. However, some find the instructions could benefit from more visual aids or expanded explanations for beginners.

The $100 price point is a common question, with many wondering if the plan’s value justifies the cost. Generally, it’s considered worthwhile if you’re comfortable with basic construction techniques and appreciate a well-organized plan. Consider supplementing the Summerwood plan with free resources like those from MyOutdoorPlans.com or Heartland’s instructions for a more comprehensive understanding of the building process.
Safety Precautions During Construction
Prioritizing safety is paramount when building an 8×10 shed. Always wear appropriate personal protective equipment (PPE), including safety glasses, work gloves, and a dust mask, especially when cutting lumber or working with roofing materials. Ensure a stable work surface and utilize ladders safely, following manufacturer guidelines.
Be mindful of power tool safety, disconnecting them when not in use and understanding their operation. When lifting heavy materials, employ proper lifting techniques or seek assistance to prevent strain or injury. Maintain a clean and organized work area to minimize trip hazards. Always be aware of your surroundings and communicate effectively with any helpers involved in the construction process.